Old photos hold priceless memories, capturing moments and emotions that we want to preserve forever. However, over time, these photos can suffer from fading, discoloration, scratches, and other damage that diminishes their quality. Thankfully, with modern PC software, restoring old photos has become easier than ever.
Using the right tools and techniques, you can bring life back to your cherished memories, correct colors, remove blemishes, and even repair torn or damaged areas. Whether you are a beginner or an experienced photo editor, restoring old photos digitally allows you to preserve your family history and personal memories in a way that’s safe and long-lasting.
In this guide, we will walk you through the process of restoring old photos using PC software, from choosing the right tools to applying both basic and advanced restoration techniques.
Table of Contents
Understanding Old Photo Damage
Before you start restoring old photos, it’s important to understand the types of damage that can occur over time. Recognizing these issues will help you choose the right restoration techniques and software tools.
Common Types of Photo Damage:
1.Fading and Discoloration – Colors in old photos often fade due to sunlight exposure, chemical reactions in the film, or aging of the paper. This can result in yellowing, washed-out tones, or color shifts.
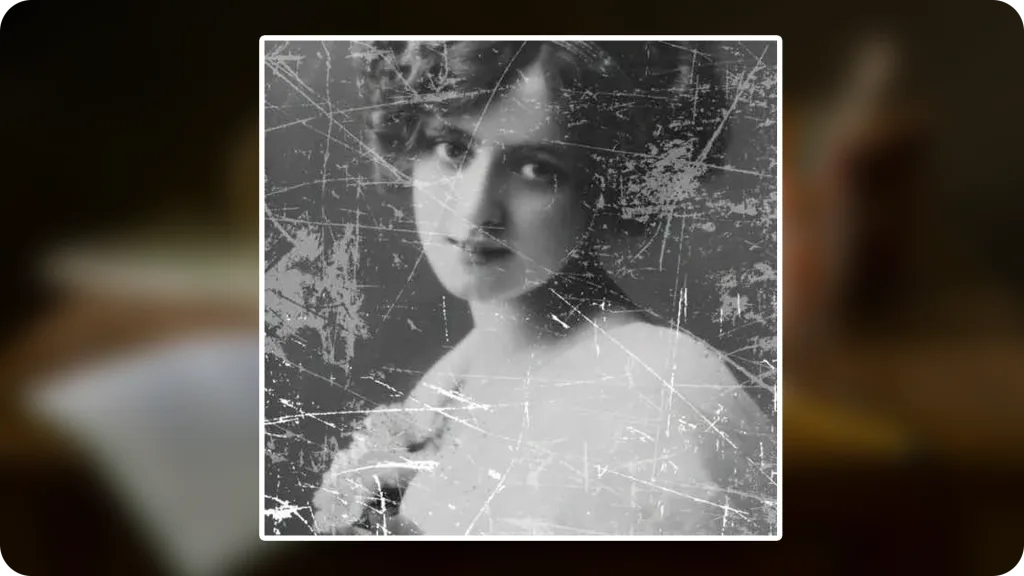
2. Scratches and Dust – Physical handling, storage in poor conditions, or accidental abrasion can leave scratches, dust spots, and blemishes on the photo surface.
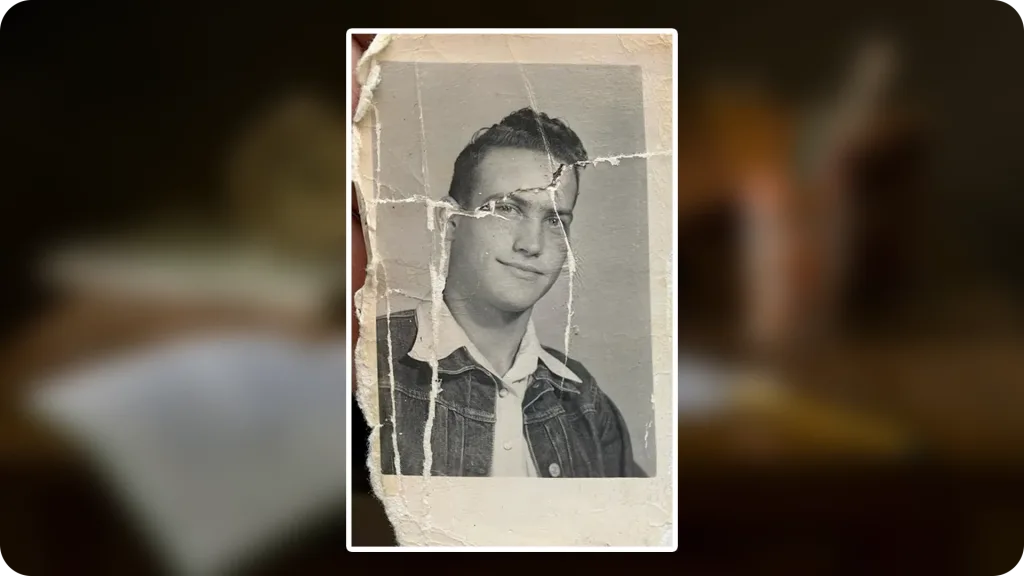
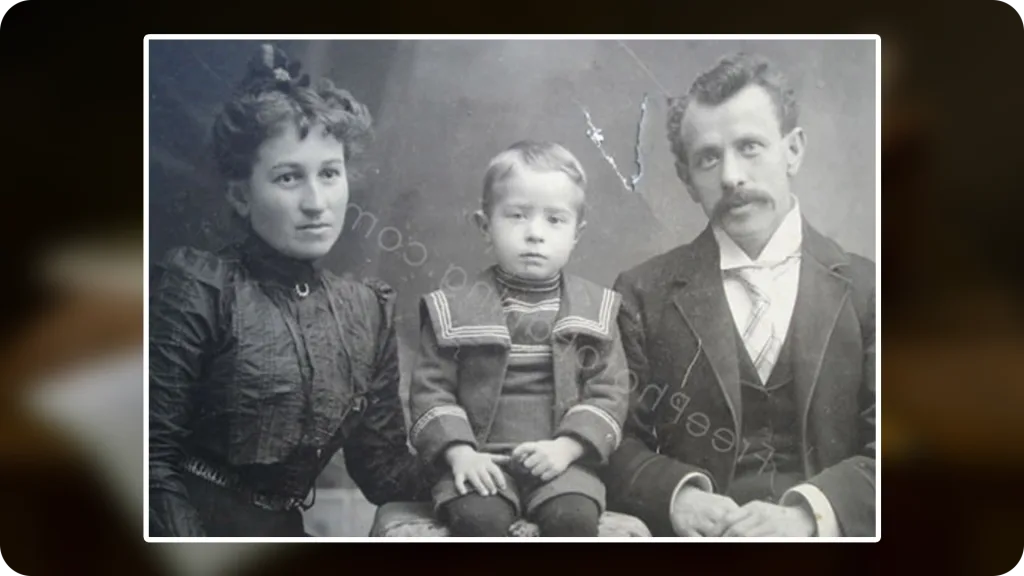
3. Tears and Missing Parts – Older photos may have torn edges or missing sections, which require careful reconstruction during restoration.
4. Stains and Water Damage – Moisture and spills can cause stains, mold spots, or warped textures in the photo.
5. Blurry or Faded Details – Over time, fine details may be lost, especially in heavily worn or overexposed photos.
Understanding these issues helps you plan a step-by-step restoration process, ensuring that each problem is addressed effectively without over-editing or losing the original essence of the photo.
Choosing the Right PC Software
Selecting the right software is crucial for restoring old photos effectively. The right tool not only makes the process easier but also ensures professional-quality results.
Factors to Consider When Choosing Software:
- Ease of Use – Beginners may prefer user-friendly software with intuitive tools, while advanced users might opt for more feature-rich programs.
- Photo Restoration Tools – Look for software that offers scratch and dust removal, color correction, exposure adjustment, and detail enhancement.
- File Format Support – Ensure the software can handle high-resolution images and save in formats suitable for printing or archiving.
- Price and Licensing – Decide whether a free tool meets your needs or if investing in paid software will give you better results.
Popular PC Software for Photo Restoration:
- Adobe Photoshop – Industry-standard software with powerful retouching and color correction tools. Perfect for advanced users.
- GIMP (Free) – Open-source alternative to Photoshop, offering many restoration features for free.
- Luminar Neo – AI-powered software that simplifies restoration, especially for color and detail enhancement.
- Affinity Photo – Affordable alternative to Photoshop with professional-level editing tools.
Choosing the right software sets the foundation for a successful restoration project. Consider your skill level, budget, and the complexity of your photos before making a decision.
Preparing Your Photos for Restoration
Before you start editing, preparing your old photos properly is essential to achieve the best restoration results. This step ensures that you work with high-quality images and protect the originals.
1. Scanning Your Photos
- Use a good-quality scanner to digitize your old photos.
- Scan at a high resolution (at least 300 DPI, ideally 600 DPI for detailed restoration).
- Save the scanned images in a lossless format like TIFF or high-quality PNG to preserve details.
2. Cleaning Your Physical Photos
- Gently remove dust and debris with a soft brush or microfiber cloth before scanning.
- Avoid using liquids or chemicals that might damage the photo.
3. Organizing Your Files
- Create a dedicated folder for your scanned photos.
- Use descriptive file names (e.g., “Grandma_1975_before_edit”) to keep track of originals and edited versions.
- Always keep a backup of the original scans to prevent accidental loss.
4. Checking for Issues
- Examine scanned images for scratches, tears, or color issues.
- Identify which photos need basic restoration versus advanced repairs, so you can plan your editing workflow efficiently.
Proper preparation saves time during editing and ensures your restoration process is smooth and effective.
Basic Photo Restoration Techniques
Once your photos are scanned and organized, you can start restoring them using PC software. Basic restoration techniques are essential for correcting common issues like scratches, color fading, and exposure problems.
1. Removing Scratches and Spots
- Use the healing brush or clone stamp tool in your software to fix scratches, dust, and minor blemishes.
- Work carefully in small sections to maintain the photo’s natural texture.
2. Correcting Color and Exposure
- Adjust brightness, contrast, and levels to restore the original tone of the photo.
- Use color correction tools to fix faded or discolored areas.
- For black-and-white photos, ensure the grayscale balance is accurate to bring out details.
3. Cropping and Straightening
- Crop out damaged edges if necessary.
- Straighten tilted or skewed photos to improve the composition.
4. Reducing Noise and Enhancing Clarity
- Apply noise reduction to remove graininess from old or low-quality scans.
- Use sharpening tools carefully to enhance details without introducing artifacts.
5. Layer Management
- Work on duplicate layers rather than the original image.
- This allows you to make adjustments without losing the original scan, making the restoration process safer and more flexible.
These basic techniques are the foundation for restoring old photos. Once you are comfortable with them, you can move on to advanced techniques, like reconstructing missing parts and enhancing finer details.
Advanced Restoration Techniques
For heavily damaged or very old photos, basic edits may not be enough. Advanced restoration techniques help you repair missing parts, enhance details, and bring your photos closer to their original quality.
1. Reconstructing Missing Parts
- Use the clone stamp and healing tools to rebuild torn or missing sections.
- For complex areas, combine multiple layers to gradually reconstruct details without affecting the surrounding image.
2. Enhancing Details
- Apply selective sharpening to bring out important features like faces, eyes, and textures.
- Use high-pass filters or detail enhancement tools in moderation to avoid making the photo look artificial.
3. Correcting Severe Color Fading
- Use color replacement or selective color adjustment to restore faded hues.
- Match colors to surrounding areas for a natural and consistent look.
4. Removing Large Stains or Water Damage
- Work with layer masks to isolate damaged areas.
- Carefully replace or blend textures using cloned sections from undamaged areas.
5. Working with Layers and Masks
- Layers allow you to make adjustments non-destructively.
- Masks help apply corrections to specific areas without affecting the rest of the photo.
6. Using AI-Powered Tools (Optional)
- Some modern software includes AI restoration features that can automatically repair scratches, enhance faces, or fill missing areas.
- AI tools are especially helpful for beginners, but always review results to ensure accuracy.
Advanced techniques take practice, but they allow you to fully restore even the most deteriorated photos while preserving their original charm.
Using Presets and Filters (Optional)
For those who want a quicker way to restore old photos, many PC software programs offer presets and filters that automatically adjust color, exposure, and clarity. These tools can save time, especially when working with multiple photos.
1. Benefits of Using Presets and Filters
- Speed: Apply corrections to multiple photos in just a few clicks.
- Consistency: Ensure a uniform look across a batch of images.
- Ease of Use: Ideal for beginners who may find manual adjustments challenging.
2. How to Use Presets and Filters Effectively
- Start with a preset as a base adjustment, then fine-tune brightness, contrast, and color manually.
- Avoid over-applying filters, as this can make the photo look unnatural.
- Test different presets to find the one that best suits the photo’s condition and style.
3. Recommended Software Features
- Lightroom: Offers professional-grade presets and batch editing.
- Luminar Neo: AI-powered filters for color correction and detail enhancement.
- Photoshop Actions: Pre-recorded sequences that automate common restoration tasks.
While presets and filters are convenient, combining them with manual editing ensures the best results, especially for severely damaged or highly detailed photos.
Common Mistakes to Avoid
Even with the best software, mistakes during photo restoration can reduce the quality of your final result. Being aware of these common pitfalls helps you restore old photos more effectively.
1. Over-Editing
- Applying excessive sharpening, color correction, or filters can make the photo look artificial.
- Aim for subtle enhancements that preserve the original character of the photo.
2. Ignoring the Original File
- Always keep a backup of the scanned original before starting edits.
- Editing directly on the original file risks permanent damage if mistakes occur.
3. Skipping Layer Management
- Working on a single layer limits flexibility and makes it hard to correct errors.
- Use layers and masks to apply edits non-destructively.
4. Using Low-Resolution Scans
- Scanning at low resolution can result in pixelated images, making restoration difficult.
- Always scan photos at high resolution (300–600 DPI) for best results.
5. Neglecting Color Accuracy
- Overcompensating for faded colors can create unnatural tones.
- Compare with other family photos or reference images to maintain realistic colors.
6. Rushing the Process
- Restoration requires patience, especially for detailed repairs.
- Take breaks and review your progress to avoid mistakes and ensure high-quality results.
Avoiding these mistakes ensures that your restored photos look natural and retain their original charm while preserving precious memories.
Step-by-Step Example: Restoring an Old Photo
To make photo restoration easier to understand, here’s a practical example using a scanned old photo. This guide uses general PC photo editing tools available in software like Photoshop, GIMP, or Luminar.
Step 1: Open and Duplicate the Photo
- Open the scanned photo in your software.
- Duplicate the original layer to preserve the untouched version.
Step 2: Crop and Straighten
- Crop out damaged edges or unwanted areas.
- Straighten the photo if it is tilted or skewed.
Step 3: Remove Scratches and Spots
- Use the healing brush or clone stamp tool to fix visible scratches, dust, or blemishes.
- Work in small sections for better precision.
Step 4: Adjust Exposure and Contrast
- Correct brightness, contrast, and levels to restore the original tones.
- Ensure the highlights and shadows are balanced.
Step 5: Correct Colors
- Use color correction tools to fix fading or discoloration.
- Adjust saturation carefully to avoid unnatural hues.
Step 6: Enhance Details
- Apply selective sharpening to areas like faces or important details.
- Reduce noise if the photo appears grainy.
Step 7: Reconstruct Missing Areas (If Needed)
- Use the clone stamp and layer masks to rebuild torn or missing sections.
- Blend carefully with the surrounding areas for a natural look.
Step 8: Final Review and Save
- Compare the restored version with the original to ensure improvements look natural.
- Save the photo in a high-quality format (TIFF or PNG) and keep the original scan as a backup.
Before-and-After Tip:
- Showing a before-and-after comparison can highlight your work and help others understand the improvements clearly.
Saving and Sharing Restored Photos
After restoring your old photos, the final step is saving and sharing them correctly. Proper saving ensures that your work is preserved, while sharing lets you enjoy and showcase your restored memories.
1. Choosing the Right File Format
- TIFF or PNG: Best for archiving, as they are lossless formats that preserve quality.
- JPEG: Suitable for sharing online, but may compress the image slightly, reducing quality.
- Consider saving both a high-quality version for archiving and a smaller version for sharing.
2. Naming and Organizing Files
- Use descriptive filenames (e.g., “Family_Reunion_1985_Restored.png”) to keep track of edited versions.
- Maintain separate folders for originals and restored images to avoid confusion.
3. Printing Restored Photos
- Use high-resolution files for printing to maintain sharpness and detail.
- Choose photo paper and printing services that enhance color accuracy.
4. Sharing Online
- For social media, optimize the image size while retaining quality.
- Watermarking can protect your restored photos if desired.
- Share stories or context with the photos to make them more meaningful to viewers.
By saving and sharing your restored photos carefully, you can preserve precious memories for years to come while showcasing your hard work effectively.
Conclusion
Restoring old photos using PC software is a rewarding way to preserve precious memories and bring new life to faded or damaged images. With the right preparation, tools, and techniques, both beginners and advanced users can repair scratches, correct colors, enhance details, and even reconstruct missing sections.
By following a step-by-step approach starting from scanning and organizing your photos, applying basic and advanced restoration techniques, and saving your work correctly you can ensure your restored photos look natural and retain their original charm.
1. Can I restore heavily damaged photos?
Yes! Even photos with tears, stains, or severe fading can often be restored using advanced techniques like cloning, color correction, and AI-powered tools. However, extremely damaged areas may require patience and careful manual editing.
2. Is free software good enough for photo restoration?
Absolutely. Free tools like GIMP provide powerful editing features such as healing brushes, color correction, and layer management. Paid software like Photoshop or Luminar may offer more advanced tools and AI assistance, but beginners can achieve great results with free programs.
3. How long does the restoration process take?
The time depends on the photo’s condition and the level of detail required. Simple fixes may take a few minutes, while complex restorations with tears or missing parts could take several hours.
4. Should I scan all my old photos before editing?
Yes. Scanning at high resolution (300–600 DPI) preserves details and allows for more precise editing. Always keep a backup of the original scans.
5. Can AI tools fully restore old photos automatically?
AI tools can speed up restoration and handle common issues like scratches and color fading, but they may not perfectly reconstruct damaged or missing areas. Manual adjustments are usually necessary for the best results.